Wagmi + ReactJS Example: Transfer Crypto and Mint an NFT


In this tutorial, we’ll be learn how to build a Web 3 Dapp (Decentralized Application) that connects to your crypto wallet, allowing you to transfer funds and mint NFTs. We’ll be using Next.js, a popular React framework, and Wagmi.sh, a collection of React Hooks that easily integrates your wallet into your website.
Here’s an outline of the tutorial:
Getting Started
Part 1: Transferring Crypto with React + Wagmi
Part 2: Minting an NFT with React + Wagmi
Authorship
This article was co-authored by Aymeric Taylor (LinkedIn, Twitter), a research intern at RareSkills.
Getting Started
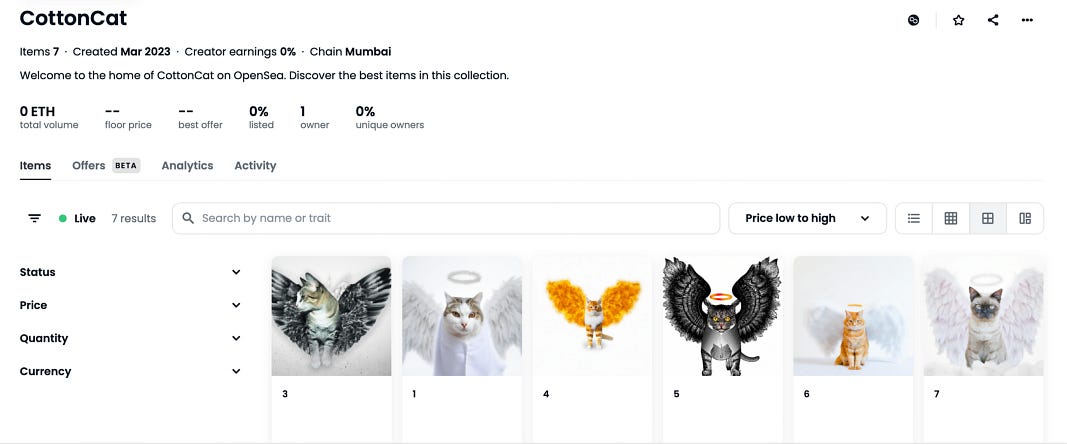
For the sake of simplicity, we’ll be using “Polygon Mumbai” as our test network for this tutorial, It is also supported on OpenSea.
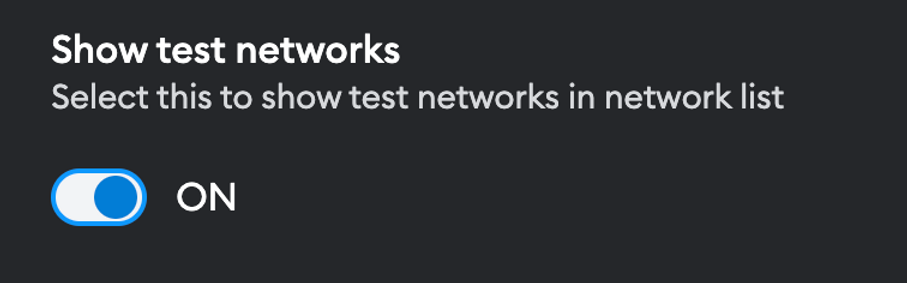
Connect your Wallet to Polygon Mumbai — MetaMask
Navigate through MetaMask → Settings → Advanced and make sure you allow Show test networks.
Next, click on the Network Selection on the top right section and select Add network
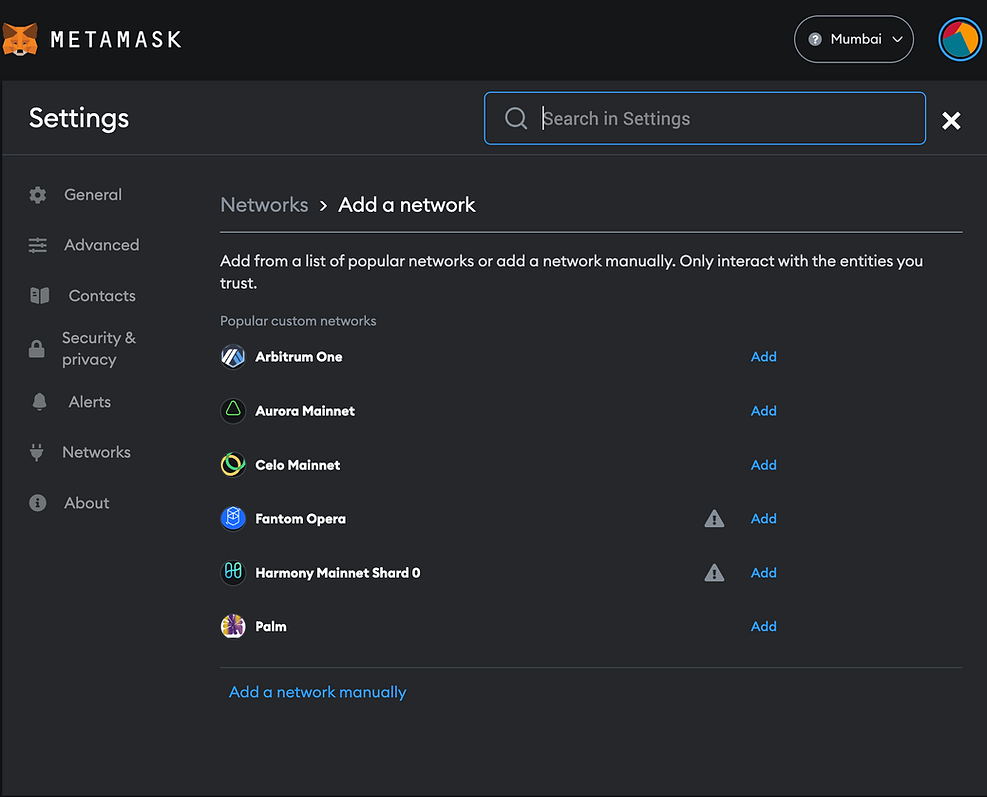
If Polygon Mumbai isn’t already available to select from, you can follow the steps below.
Select Add a network manually and input the following:
Network Name: Matic Mumbai
New RPC URL : https://rpc-mumbai.maticvigil.com/
Chain ID : 80001
Currency Symbol : MATIC
Block explorer URL (optional) : https://mumbai.polygonscan.com/
Now simply switch onto the Polygon Network
Part 1: Transfering Ether with React + Wagmi
Step 1: Set up website with node js
You’ll need to have nodejs installed for this.
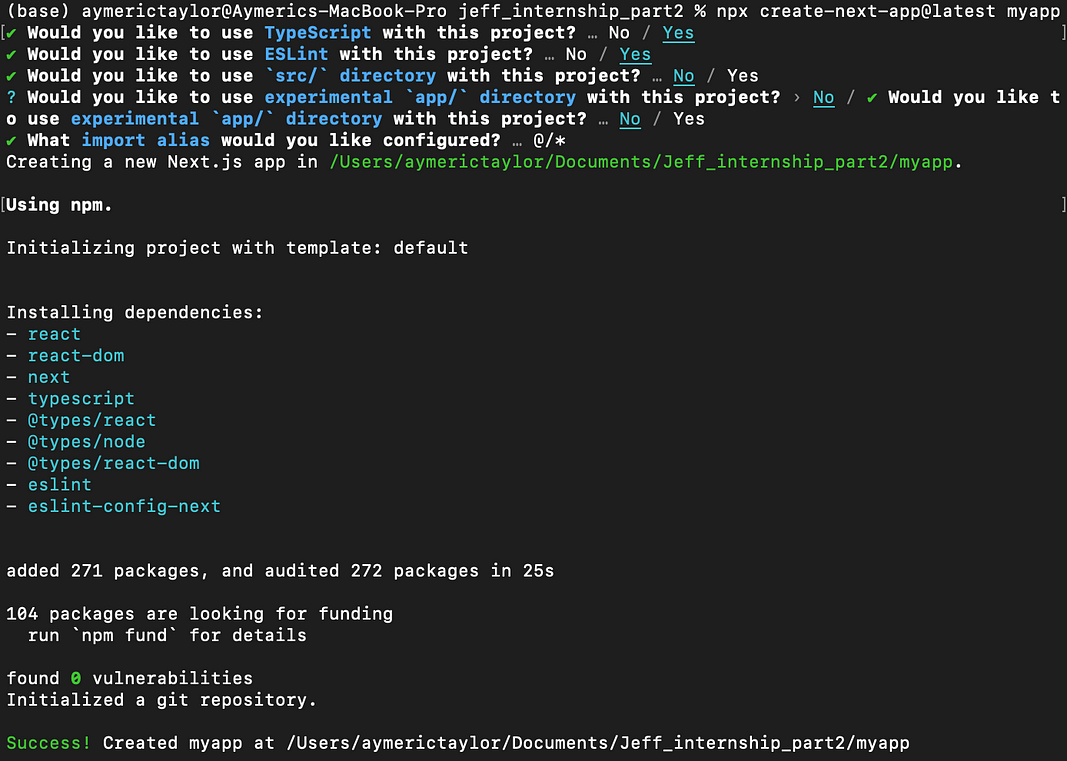
First create your Next.js project with
npx create-next-app@latest myapp
Check the Typescript and ESLint option using the arrows and enter key. It should look something like this:
Open your project in vscode and install wagmi.sh and use-debounce package (we’ll get into that later).
npm i wagmi ethers@^5
npm i use-debounce --save
Wagmi is basically a set of React Hooks that simplifies Ethereum development by providing useful features such as connecting wallets and interacting with contracts which we’ll learn in this tutorial. More on wagmi.sh.
Step 2: Use configureChains to pick the network to connect to
Head over to pages/_app.tsx and add in the following code. Each of functionalities are explained in the comment sections.
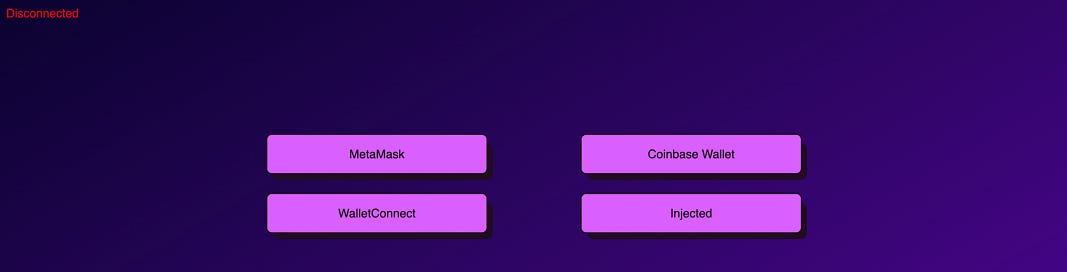
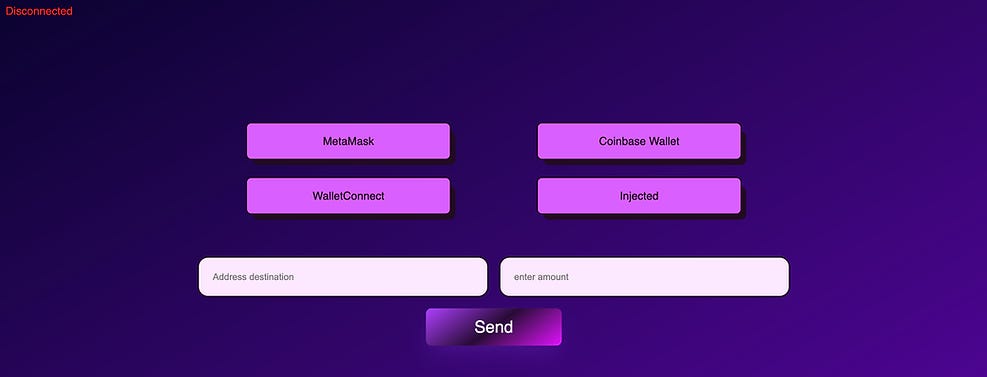
We now have our networks configured, our next step is to allow users to choose which wallet to connect to. As you can see above, we have 4 wallet connectors set up. MetaMask, WalletConnect, Coinbase and Injected(which again is basically your default wallet).
Step 3: Use useConnect to enable picking the browser wallet
On pages/index.tsx copy and paste the following code. Make sure you add the css, so it looks good!
Step 4: Add css to make it look nice
Delete everything on styles/globals.css and styles/Home.module.css.
Copy paste the css code below on styles/globals.css.
body {
    height: 100vh;
    background: rgb(11,3,48); /* For browsers that do not support gradients */
    background: linear-gradient(to bottom right,#0b0330, #5904a4);
    font-family: 'Inter Medium', sans-serif;
}
Copy paste the css code below into styles/Home.module.css.
Step 5: Run the website and test it
When you run this, this should initiate a connection to your wallet. Once you’ve approved the connection, it should look something like this:
npm run dev
Step 6: Add ability to transfer cryptocurrency
Now that we’ve connected our wallet, we can transfer funds from our wallet to others. Make sure you have some Mumbai MATIC in your wallet. You can get some here https://faucet.polygon.technology
We’ll now be creating the input fields and send button for the transaction. Create a new file under pages/ directory and name it RareSend.tsx. Copy paste the code below. The explanations are in the code comments.
useDebounce() explained
To avoid overloading the RPC and getting rate-limited, we’ll limit the use of usePrepareContractWrite hook, which requests gas estimates on component mount and args modification. We use useDebounce hook in the component to delay updating the token ID by 500ms if no changes have been made.
Step 7: Insert sendFunds component
Next, simply add the <SendFunds disabled={!isConnected}/> like this in pages/index.tsx.
As long as you have Matic in your address, you’re able send it to another account!
This should be how your website looks like:
Congratulations on reaching this point! You have successfully created your own website that can send funds from your wallet to another account. You are now able to easily transfer cryptocurrency between accounts, without having to rely on a third-party service or manually entering transaction details. Well done! It’s that easy!
Part 2: Minting an NFT with React + Wagmi
We assume you have already have deployed an NFT smart contract to the blockchain. You can follow this video tutorial to do so: https://youtu.be/LIoFbudNVZs.
The mint function can be created as follows. Create a mint.tsx and add the codes below:
Now you can simply insert it into the index.tsx file like this:
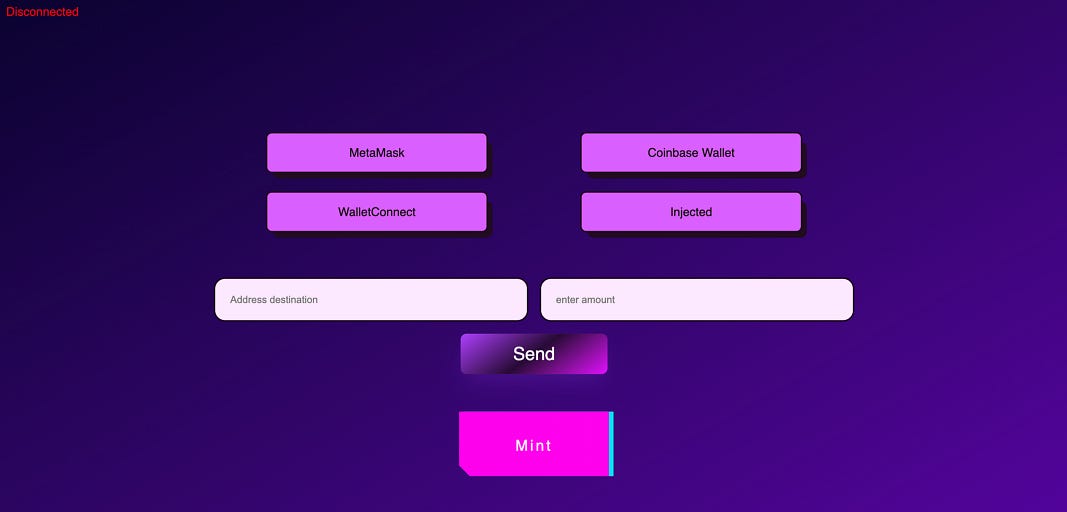
Your final website should look something like this:
Congratulations! You’ve just made your own Decentralized Application that is capable of Sending Transactions and Minting an NFT.
Learn More
This is used as teaching material for our Dapp Bootcamp.